A healthy website is absolutely essential for success in content marketing.
We assess that health with technical SEO audits. We created this template to help you get start diagnosing any website health issues that might be negatively impacting your website’s performance.
Why we created this template
At ércule, we begin every client engagement with a technical SEO audit.
This is the template we use now, refined over many years and iterations. (And there might even be a more recent one by the time you’re reading this, so feel free to reach out for the latest!)
What you need to get started
- Google analytics account
- Google search console account
- Screaming Frog SEO Spider
How this template works
- Import data from various sources
- Fill out the checklist to determine site health
Step-by-step: using the technical SEO audit template
To start, open up the template and make a copy.
Pick the domain you want to audit

On the Audit tab, fill in the domain and date for the site you want to audit.
The first thing we want to do is pull in page performance data, to help us understand where our priorities are when it comes to fixing various technical issues.
To do this, we use a plugin called SyncWith to call data from various tools. For this audit, you want to pull in page performance data from Google Analytics.

Pull in data from Google Analytics 4 if possible, since Universal Analytics (aka GA3) was deprecated in July of 2023.
After configuring the report, click Update to call the data.
Next, you’ll pull in the sitemap. in the sitemapData tab – fill in cell A2 with the url of the sitemap. A formula will auto-populate the results after a few seconds.
Next up, we pull in data for the coverageData tab. For this report, you need to go to Google Search Console for the website, and find the Page Indexing report. Export relevant list of pages and copy to the sheet.

Crawl the site with SEO Spider
Now that all of the external data has been imported, we have to crawl the site. To do this, you need to download Screaming Frog’s SEO Spider, a web crawling tool. After installation, load our custom configuration file and get started.
Screaming Frog Config File (click ‘download raw file’ in GitHub)
Now, choose the domain you want to crawl, and input it into SEO Spider’s url box.
Next, go to configuration>API>Pagespeed Insights, and connect it to the crawler using your API key. Once this is done you can start the crawl.
After the crawl is complete, you’ll export 4 reports:
- On the internal tab, filter the crawl to just show HTML pages, export, and paste the data into the internalData tab
- In the menu bar, go to Bulk Export > Links > External Links and export, and paste the data into the externalData tab
- In the menu bar, go to Bulk Export > Response codes > Internal > Internal Client Error (4xx) Inlinks, and paste the data into the 404data tab
- In the menu bar, go to Reports > Redirects > All Redirects, and paste the data into the redirectData tab
Run through the Audit checklist

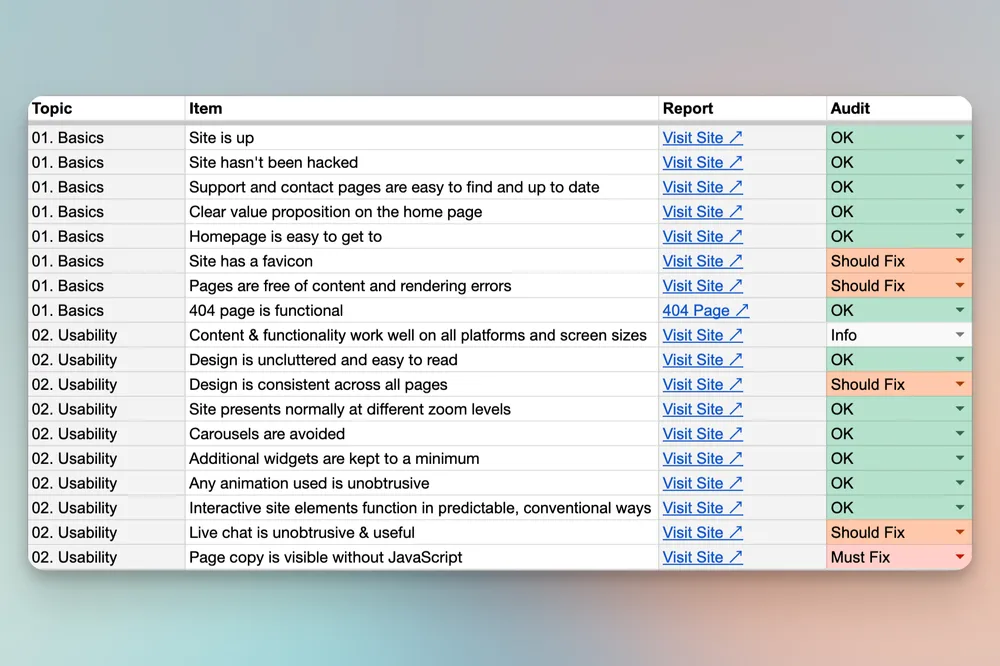
Now that all of the data is in place, walk through the items in the Checklist tab one-by-one.
Some of the items will be answered automatically by data in the Analysis column, others will require you to follow the link in the Report column to determine the correct status.
If you get stuck, Use the guide column as a reference to figure out what the purpose of the audit item is and what you’re trying to answer.
Prioritizing technical SEO
Once you’ve run the audit and have your results, it’s time to figure out what to fix first. We recommend starting with the “Must fix” items and working your way through from there. A typical technical SEO website audit might return duplicate title and meta descriptions across many pages, slow site speed or poor performance, and scripts slowing down page load times. For site speed and performance issues, we recommend turning the highest priority “must fix” items into tickets for your web developers to prioritize. For items like title tags and meta descriptions, your marketing team can often get to work updating those items directly in your CMS.
Reach out with any questions!
We’re continuously refining our process for technical SEO audits, and there’s a good chance we’ve added a few features since we last updated this post. If you’re running into any problems, or just want help prioritizing what the most important issues are to tackle first, let’s chat!

